One of the common tasks in the Magento is changing the appearance and structure of the site to make your store more stunning and run smoothly. Today, we will show you a Layout Tutorial Magento so you can customize your frontend store as you like!
In Magento, three path structures determine your front-store are: layout, block, and container.
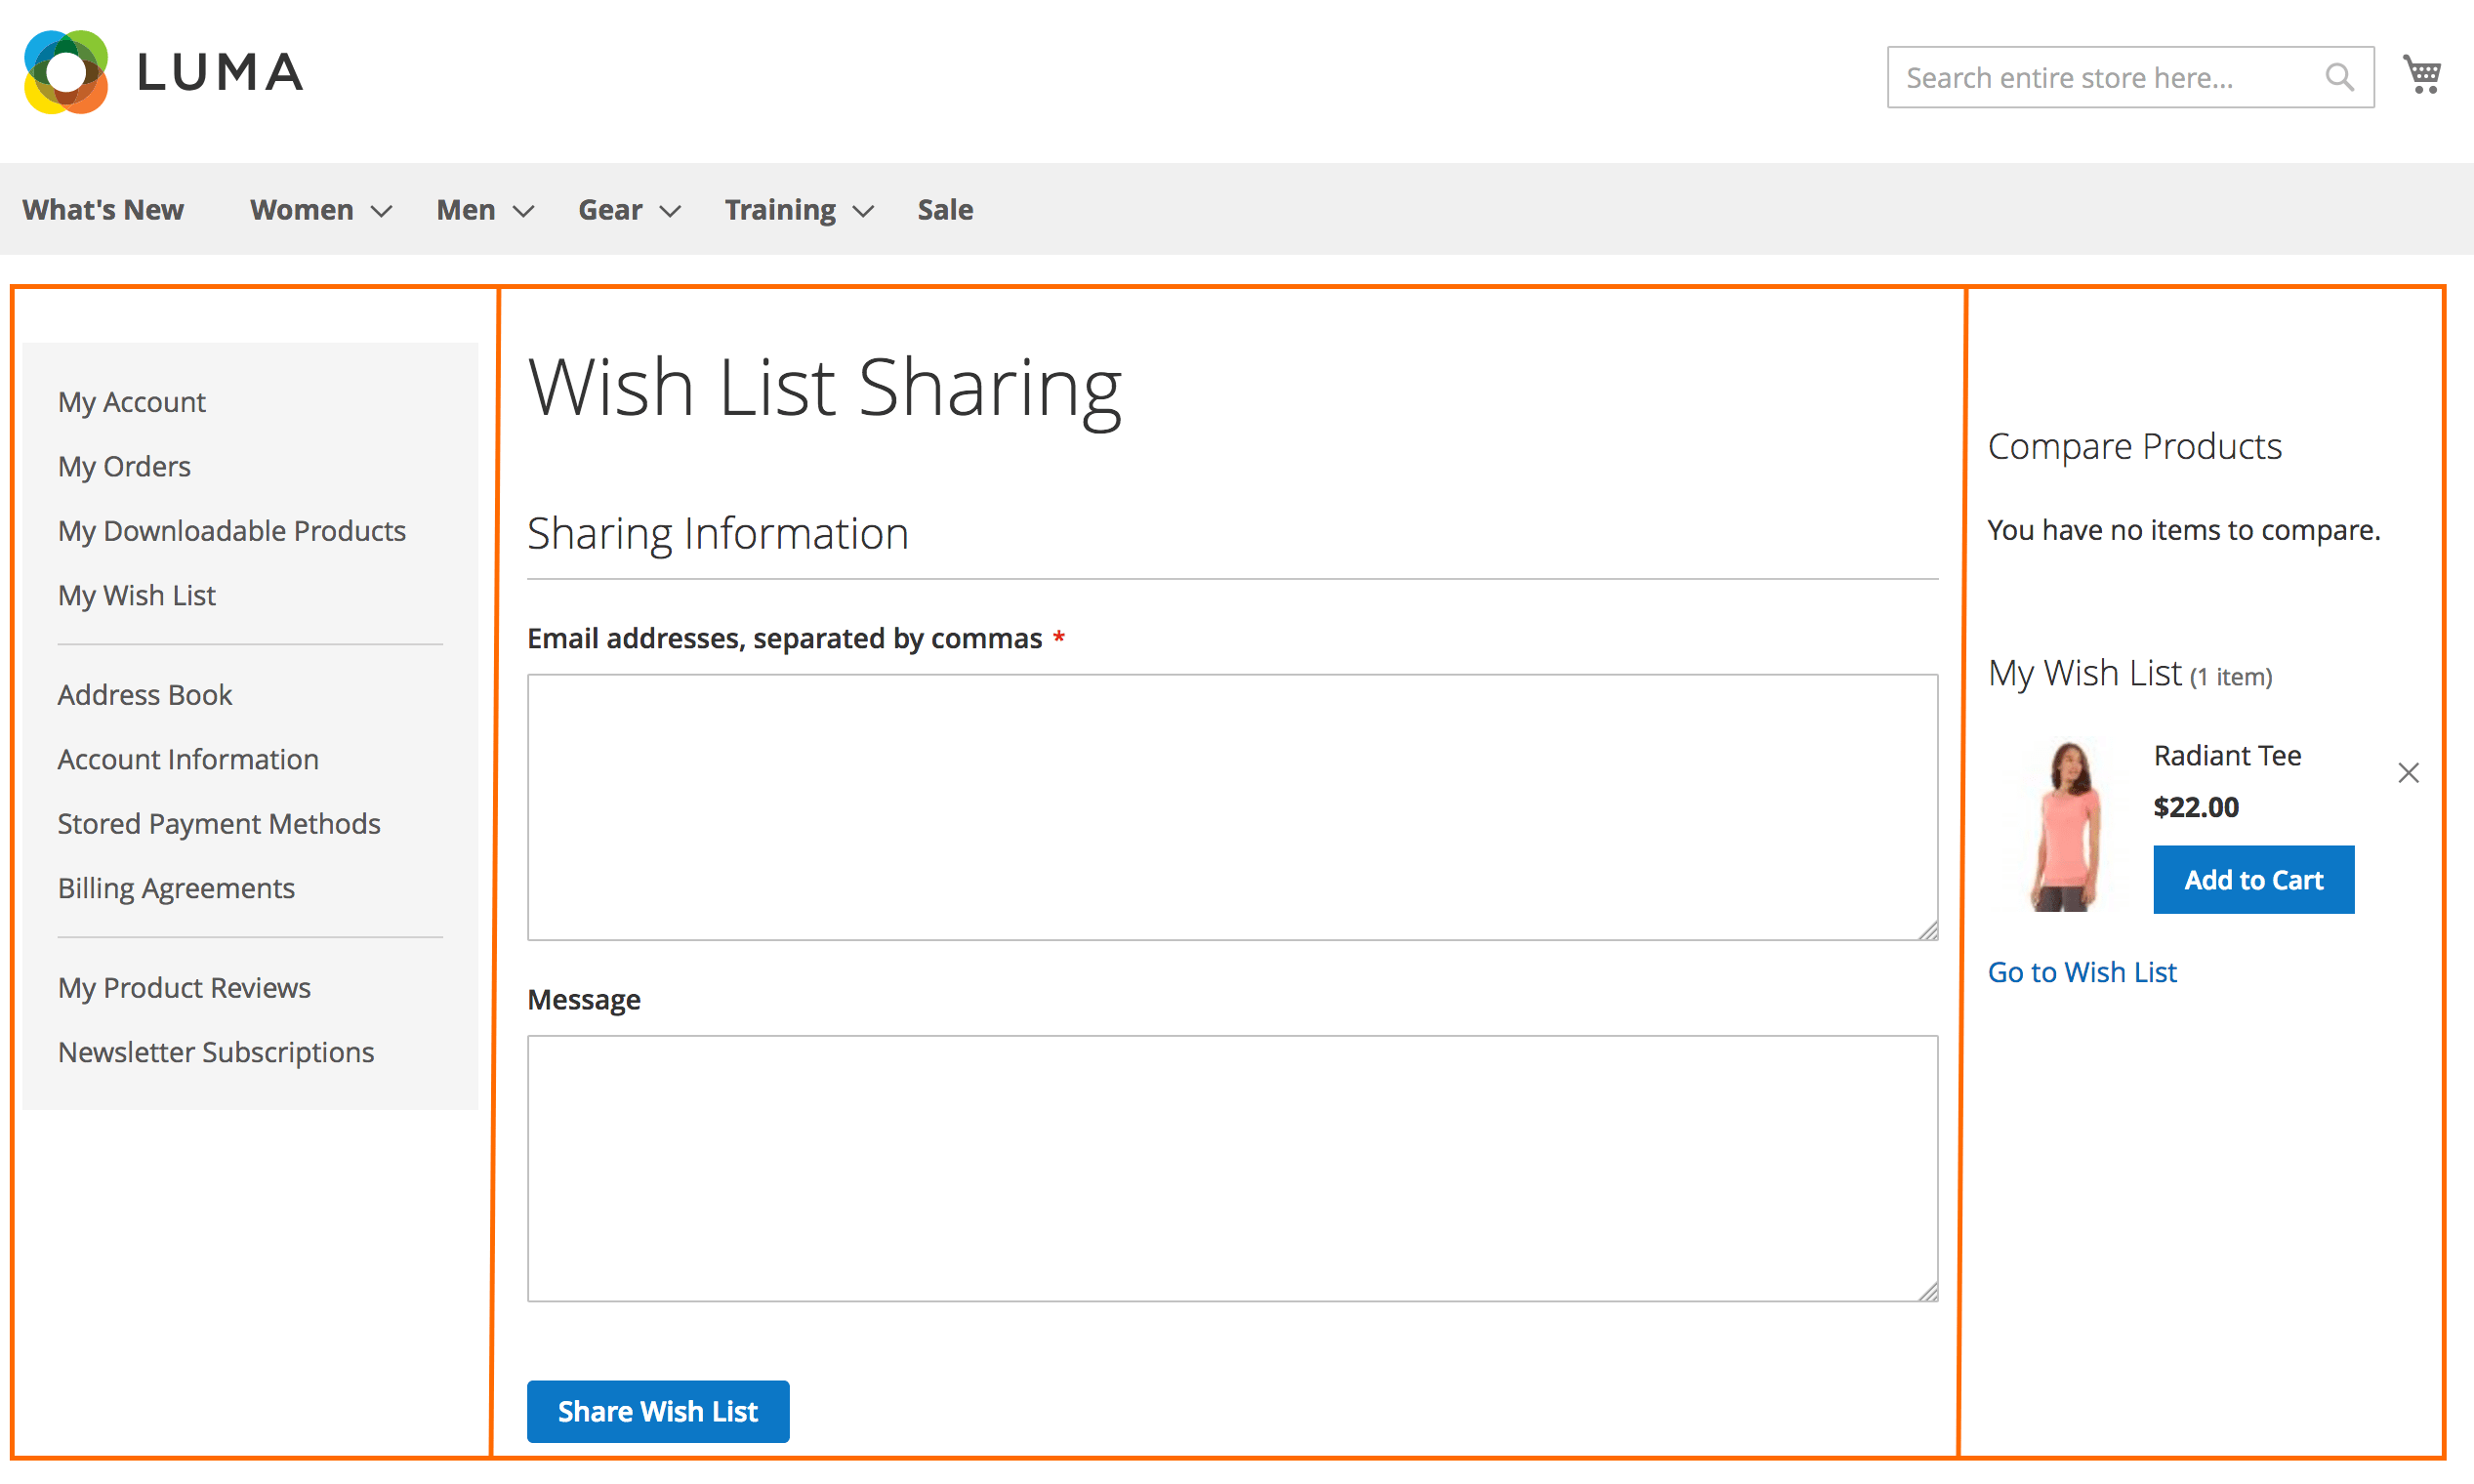
The page structure looks the same as the XML (Extensible Markup Language) file that is much like the HTML (HyperText Markup Language) structure to create one or several columns.
In this article, I’ll represent to you how to create and customize the layout. Let’s read all our Magento 2 Layout Tutorials to create your template and upscale visitors.
Let’s go now!
What Is Magento Layouts File?
A Layout file is a file that shows the appearance of your front-store to customers. The layout file is .xml file which resides in app > design > frontend > your interface > your theme > layout.
Each layout file contains a block and a container. A container is a package including code, configuration, and system libraries to make your website run smoothly.
It helps the layout to build a website appearance, for example, header, left column, main column, and footer.
Meanwhile, a block creates a link between the layouts and templates to design your website, including a category list such as a cart, product tags, and product listing.
More about Magento layout files
First, you go to app > design > frontend > base > layout and open the customer.xml file. You can see the different <tag> containing different blocks for your site.
<?lt;!--

New customer registration

-->


    <customer_account_create translate="label">

        <label>Customer Account Registration Form</label>

        <!-- Mage_Customer -->

        <remove name="right"/>

        <remove name="left"/>


        <reference name="root">

            <action method="setTemplate"><template>page/1column.phtml</template></action>

        </reference>

        <reference name="content">

            <block type="customer/form_register" name="customer_form_register" template="customer/form/register.phtml">

                <block type="page/html_wrapper" name="customer.form.register.fields.before" as="form_fields_before" translate="label">

                    <label>Form Fields Before</label>

                </block>

            </block>

        </reference>

    </customer_account_create>
Handle and Block
Handles are the main entity through which Magento determines which block to load when a particular module is being called. <customer_account_create> is the module-specific handle. When someone accesses the Consumer Registration tab, this handle is activated.
Block has 2 types, there are structure blocks and content blocks. A content block is used when you want to add a specific type of “content” to a “Section” of the template or proposal.
While structural blocks are the structure of the content of the pages. They don’t have any actual content to display, however, they display the content blocks at the end.
For example, “Header”, “Footer”, “Left” and “Right” are structural blocks in Magento.
How to Create A New Magento 2 Layout?
In this Magento 2 Layout Tutorial, I’m going to represent you how to create a new Magento Layout as you don’t want to use a free theme.
We’ve already known that Magento’s default has a column, 2 columns with left bar, and 2 columns with right bar.
So, if you want to create it, first, you have to create a custom page.XML file following to this: app/design/frontend/<VendorName>/<ThemeName>/Magento_Theme/page_layout/3-columns-double-footer.xml.
<?lt;?xml version="1.0"?>

<layout xmlns:xsi="http://www.w3.org/2001/XMLSchema-instance" xsi:noNamespaceSchemaLocation="urn:magento:framework:View/Layout/etc/page_layout.xsd">

    <update handle="3columns"/>

    <referenceContainer name="page.wrapper">

        <container name="footer-bottom" as="footer-bottom" after="-" label="Footer Bottom" htmlTag="footer" htmlClass="page-footer-bottom"/>

    </referenceContainer>

</layout>
Secondly, you add a new page layout to the layouts.xml following to app/design/frontend/<VendorName>/<ThemeName>/Magento_Theme/layouts.xml.
<?lt;?xml version="1.0" encoding="UTF-8"?>
<page_layouts xmlns:xsi="http://www.w3.org/2001/XMLSchema-instance" xsi:noNamespaceSchemaLocation="urn:magento:framework:View/PageLayout/etc/layouts.xsd">
<layout id="3-columns-double-footer">
<label translate="true">3 Columns Double Footer</label>
</layout>
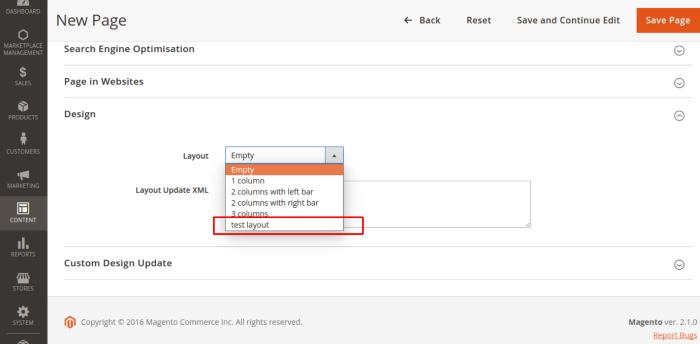
</page_layouts>As a result, your new page layout will display below:
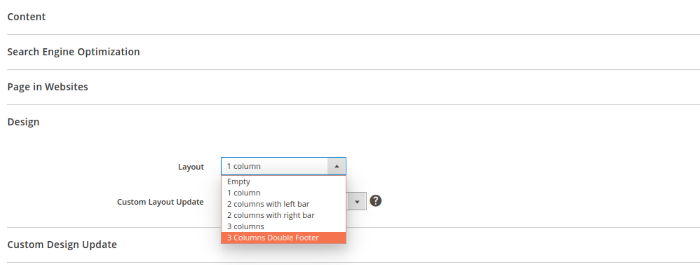
You can check on your Admin Panel Configuration Setting to test Magento 2 Theme Layout.
How To Create Magento Layout XML?
I’m also telling you how to create the layout .xml in this Magento Layout XML Tutorial.
- Go to app > design > frontend > default > default > layout and create the mymodule.xml.
- Then, copy the code below:
<?lt;?xml version="1.0"?>

<layout version="0.1.0">

    <mymodule_index_index>

        <reference name="content">

            <block type="mymodule/mymodule" name="mymodule" template="mymodule/mymodule.phtml" />

        </reference>

    </mymodule_index_index>

</layout>
How To Customise Layout in Magento 2 Layout Tutorial?
#1. Set the page layout
Following to Magento Layout Tutorial, if you want to change the Search page from 1 column to 2 column, you can just extend catalogsearch_advanced_index.xml in your theme by adding the following layout:
<?lt;page layout="2columns-left" xmlns:xsi="http://www.w3.org/2001/XMLSchema-instance" xsi:noNamespaceSchemaLocation="urn:magento:framework:View/Layout/etc/page_configuration.xsd">

...

</page>
#2. Include static resources (JavaScript, CSS, fonts)
Do you want to change the <head> of your site? Magento 2 Layout Tutorial will help you to change it. The default look of a Magento store page <head> is defined by app/code/Magento/Theme/view/frontend/layout/default_head_blocks.xml. Therefore, you can add CSS and JavaScript is to extend this file in your custom theme, and add the assets there. So, add the code below:
<?lt;page xmlns:xsi="http://www.w3.org/2001/XMLSchema-instance" xsi:noNamespaceSchemaLocation="urn:magento:framework:View/Layout/etc/page_configuration.xsd">

  <head>

    <!-- Add local resources -->

    <css src="css/my-styles.css"/>

    <!-- The following two ways to add local JavaScript files are equal -->

    <script src="Magento_Catalog::js/sample1.js"/>

    <link src="js/sample.js"/>

    <!-- Add external resources -->

    <css src="https://maxcdn.bootstrapcdn.com/bootstrap/3.3.4/css/bootstrap-theme.min.css" src_type="url" />

    <script src="https://maxcdn.bootstrapcdn.com/bootstrap/3.3.4/js/bootstrap.min.js" src_type="url" />

    <link rel="stylesheet" type="text/css" src="http://fonts.googleapis.com/css?family=Montserrat" src_type="url" />

  </head>

</page>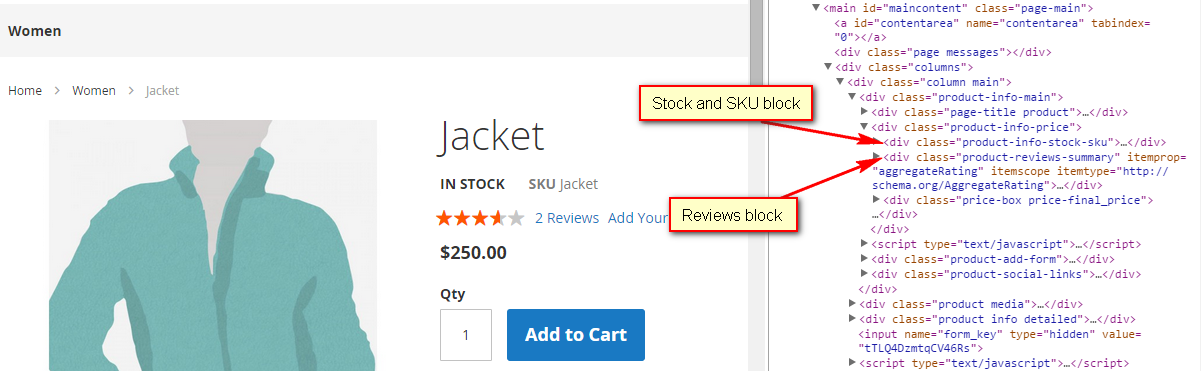
That is about Magento 2 Layout XML Tutorial. But what if you want to add the conditional comments for Microsoft Internet Explorer?
#3. Remove static resources (JavaScript, CSS, fonts)
To remove the static resources, linked in a page <head>, make a change similar to the following in a theme extending app/design/frontend/<Vendor>/<theme>/Magento_Theme/layout/default_head_blocks.xml:
<?lt;page xmlns:xsi="http://www.w3.org/2001/XMLSchema-instance" xsi:noNamespaceSchemaLocation="urn:magento:framework:View/Layout/etc/page_configuration.xsd">

   <head>

    <!-- Remove local resources -->

    <remove src="css/styles-m.css" />

    <remove src="my-js.js"/>

    <remove src="Magento_Catalog::js/compare.js" />

    <!-- Remove external resources -->

    <remove src="https://maxcdn.bootstrapcdn.com/bootstrap/3.3.4/css/bootstrap-theme.min.css"/>

    <remove src="https://maxcdn.bootstrapcdn.com/bootstrap/3.3.4/js/bootstrap.min.js"/>

    <remove src="http://fonts.googleapis.com/css?family=Montserrat" />

   </head>

</page>
#4. Set Conditional Comments
Some of your customers use Microsoft Internet Explorer to access your website. In terms of adding assets, you can add CSS files to be included for a specific version of Internet Explorer. A sample follows:
<?lt;page xmlns:xsi="http://www.w3.org/2001/XMLSchema-instance" xsi:noNamespaceSchemaLocation="urn:magento:framework:View/Layout/etc/page_configuration.xsd">

  <head>

    <css src="css/ie-9.css" ie_condition="IE 9" />

  </head>

</page>
#5. Set Body Attribute of Blocks
To add a new tag, you just follow the code:
<?lt;body>

        <attribute name="class" value="my-new-body-class"/>

    </body>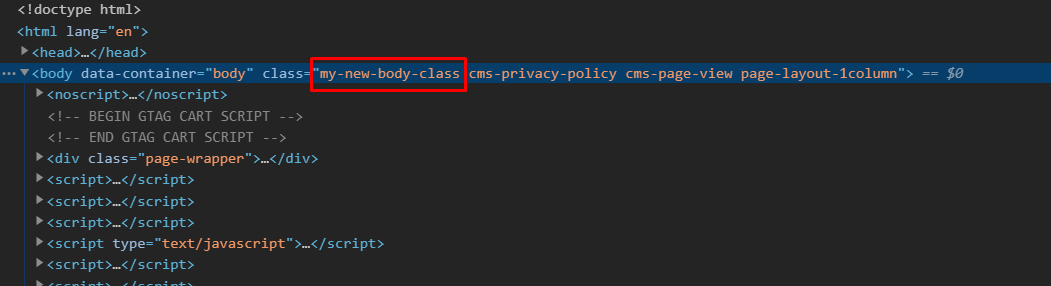
Conclusion
So, here is all about Magento 2 Layout Tutorial for your Magento website. In this article, I introduced you to how to customize Magento 2 layout XML tutorial, Magento layout tutorial, and Magento layouts.
If you have any questions, don’t hesitate to comment below. We’re 24/7 to answer your questions.
Thank you for your time!