What is New Relic Magento Reporting admin panel?
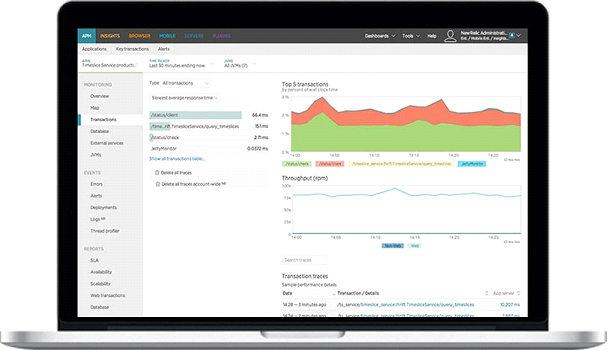
New Relic Magento is a SaaS-based subscription service. This service provides detailed real-time visibility into business and performance metrics for data-driven decision making.
Tutorial on using New Relic Magento Reporting
There are four steps on using New Relic Reporting: Sign Up for a New Relic Account, Install the New Relic Agent on Your Server, Configure Your Store and Enable Cron for New Relic Magento Reporting.
Step 1: Sign Up for a New Relic Account
Visit a New Relic website to sign up. Follow the instruction and choose the product that you want to install first.
After signing in, locate the following credentials that you will need to complete the configuration:
| Account ID | On the dashboard, the Account ID is the number in the URL after /accounts |
| Application ID | On the dashboard, click New Relic APM. In the menu, click Applications. Then, select your application. The number in the URL after /applications/ is the Application ID. |
| New Relic API Key | On the dashboard, click Account Settings. In the menu on the left under Integrations, click Data Sharing. You can create, regenerate or delete the API key from this page. |
| Insights API Key | On the dashboard, click Insights. In the menu on the left under Administration, click API Keys. Your Insights API Key(s) display on this page. To generate a key, click the plus sign (+) next to Insert Keys. |
Step 2: Install the New Relic Magento Agent on Your Server
To gather and transmit data using New Relic APM Pro, you have to install the PHP agent on your server.
- After selecting a web agent, click PHP.
- Follow the instructions. See New Relic for PHP if you need help
- Make sure that cron is running on your server. Read Configure and run cron in Magento 2 if you need help.
Step 3: Configure Your Store
On the admin sidebar click Stores. Then under Settings, click Configuration. Under General click New Relic Reporting and follow these steps:
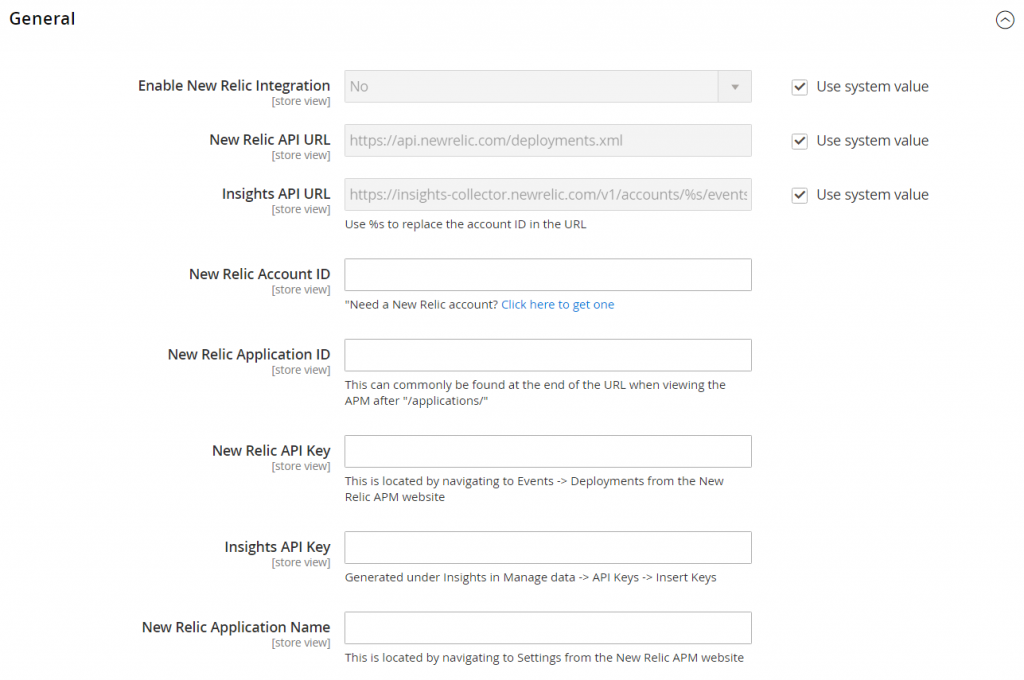
Set Enable New Relic Integration to “Yes.”
In the Insights API URL, replace the percent (% symbol with your New Relic Account ID) and input all required information and click Save Config.
Step 4: Enable Cron for New Relic Reporting
Open the Cron tab

Set Enable Cron to ”Yes” and click Save Config.
Above is a tutorial on using New Relic Reporting in Magento 2. Feel free to comment or contact us directly if you have any questions. In the next article, we will describe New Relic Queries in Magento 2. Keep tracking Mageguides for more Magento 2 guideline articles.
Conclusion
We hope that after reading our guide now you have known how to use new relic reporting in Magento 2.
Don’t forget to like, share, and subscribe to read the more useful tutorials for your website.!