Magento bundle product is a product type that cannot be missed in your online store. Bundle products are a way of selling several related products together as a single package.
The following guidance would walk you through the creation of a Magento 2 bundle product using a product type, needed fields, and basic settings. When you get the basics finished, you can complete the advanced settings and other settings if necessary.
Step 1: Choose the Product Type
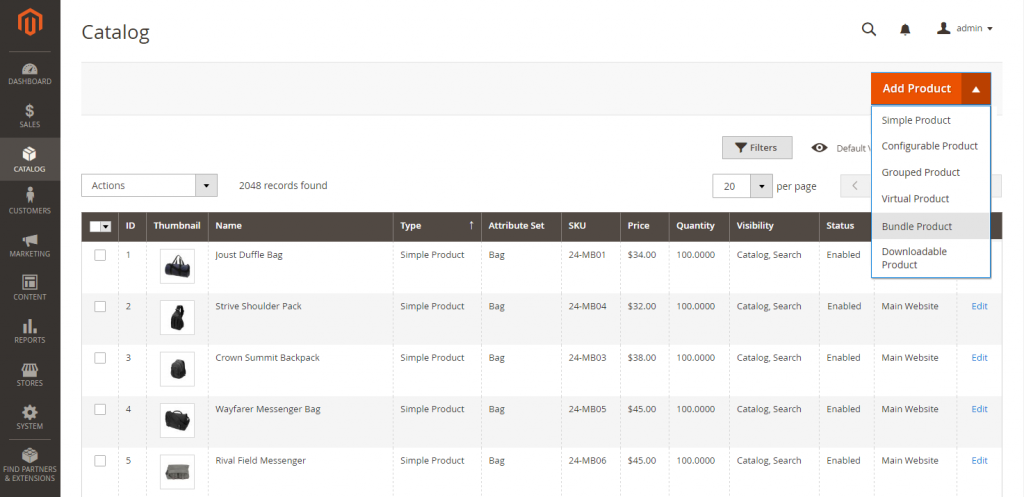
1/ Choose Catalog > Products in the Admin sidebar.
2/ Choose Bundle Product on the Add Product menu in the upper-right corner.
Step 2: Choose the Attribute Set
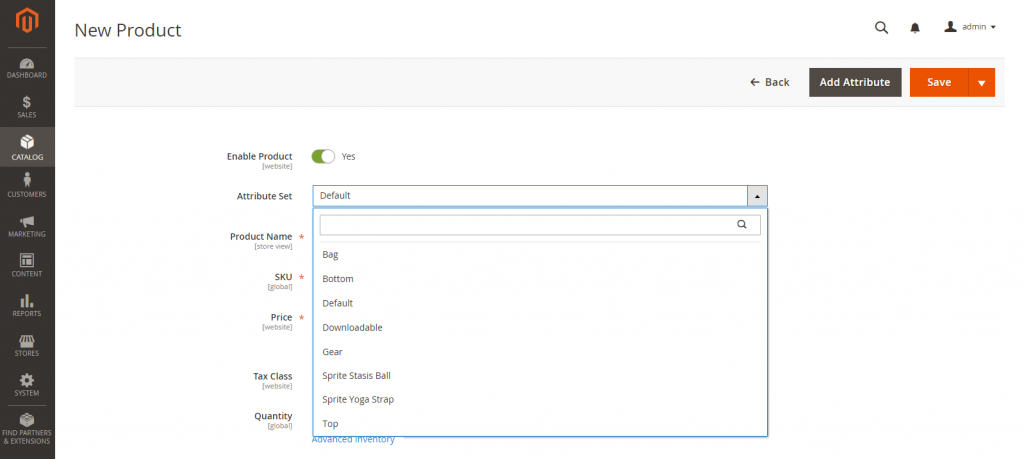
To choose the attribute set used as a template for the Magento bundle product, do either of the following:
- In the Search box, enter the name of the attribute set.
- On the list, choose the attribute set that you want to use.
Step 3: Complete the Required Settings
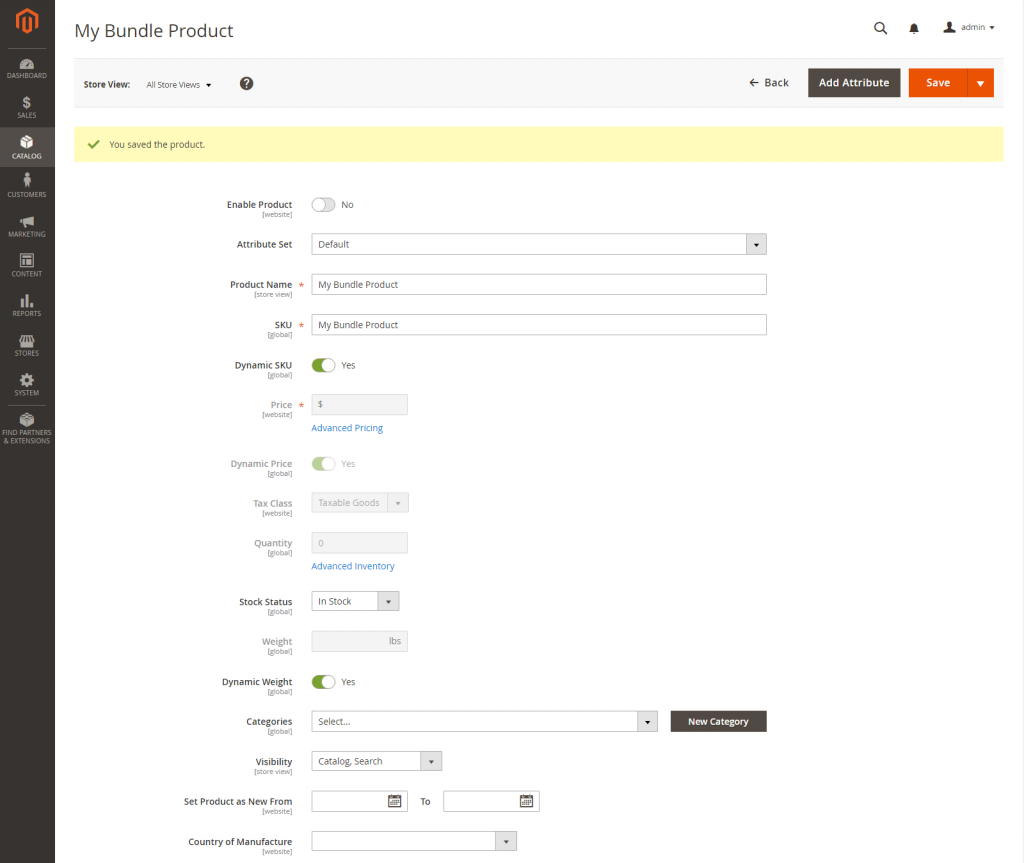
1/ Enter Product Name.
2/ You can accept the default SKU based on the product name or enter a different value. To determine the type of SKU assigned to each bundle item, do the following:
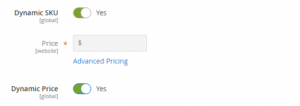
- By get a suffix added to the default SKU, a Dynamic SKU can be assigned automatically to each bundle item. This is by default Yes.
- Set Dynamic SKU to No if you want to assign a unique SKU for each bundle item.
3/ Do one of the following to determine the price of the bundle:
- A Dynamic Price changes to reflect the alternatives chosen by the customer. By default, this is Yes, and the Price field is blank.
- To apply a fixed price to the bundle, set Dynamic Price to No. And then, type the Price that you want.
4/ As the product is not 100% ready to be published, you need to set Enable Product to No.
5/ Save and continue.
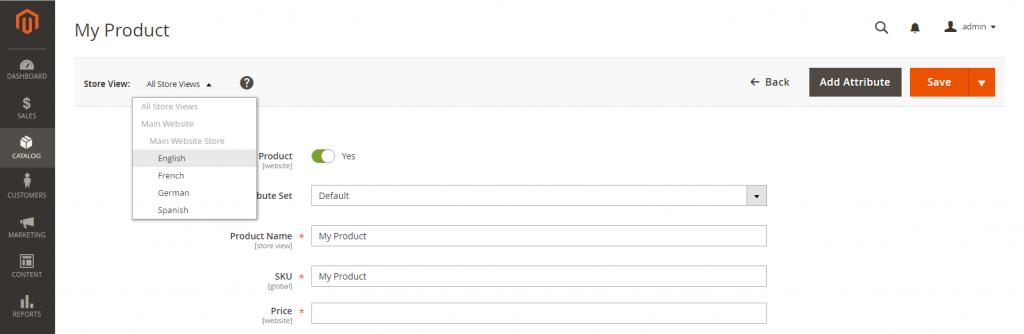
6/ In the upper-left corner appears the Store View chooser when the product is saved. Select the Store View in which the product will be available.
Step 4: Complete the Basic Settings
1/ Set Tax Class to None or Taxable Goods if the bundle has Fixed Pricing. In the case of Dynamic Pricing, the tax is applied for each bundle item.
2/ Take note of the following:
- The Quantity is not available as the value is determined for each bundle item.
- The Stock Status is by default set to In Stock.
3/ To determine the weight of the bundle, do either of the following:

- Dynamic Weight changes to reflect the options chosen by the customer. Dynamic Weight is by default Yes, and the Weight field is blank.
- To assign a fixed weight to the bundle, set Dynamic Weight to No. Then, enter the Weight of the bundle to assign a fixed weight to the bundle.
4/ Select the Set Product as New checkbox to feature the product in the list of new products.
5/ Accept the default Visibility setting, Catalog, Search.
6/ Click the Select… box. Then, do either of the following to assign Categories to the product:
- Choose an existing category by typing in the box to find a match, and then choose the checkbox of each category that is to be assigned.
- Set up a new category: New Category > Category Name > Parent Category > Create Category.
7/ Choose the Country of Manufacture.
There might be extra attributes describing the product. The selection varies attribute set, and you can finish them later.
Step 5: Add the Bundle Items

1/ Scroll down to the Bundle Items section. Then, set Ship Bundle Items to Separately or Together.

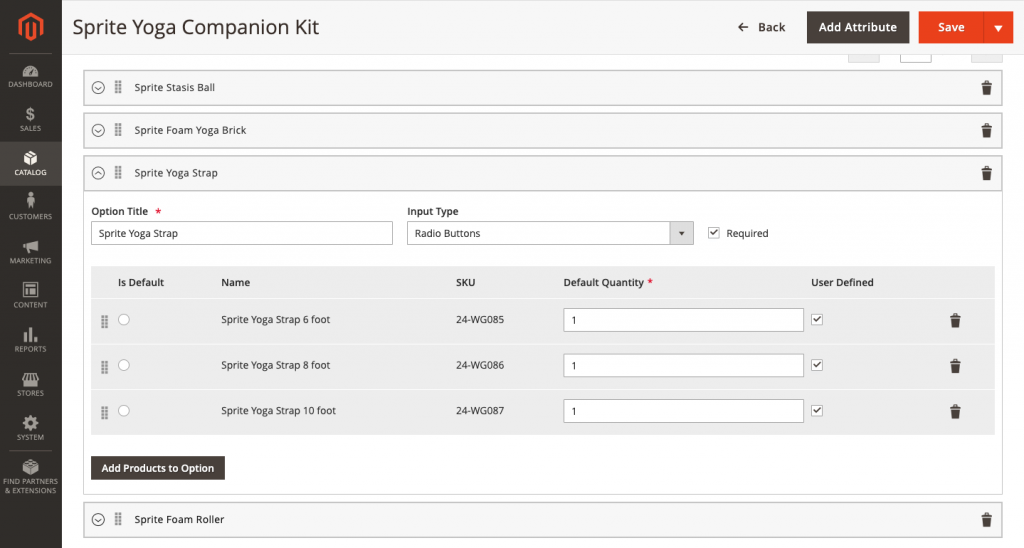
2/ Click Add Option; then, do the following:
- Type an Option Title to be used as the field label.
- Set Input Type to one of the following:
+ Drop-down
+ Checkbox
+ Radio buttons
+ Multiple Select
- Mark the Required checkbox to make the field a required entry.
- Click Add Products to Option and then, select the checkbox of each product you want to include in this option. In the case of many products, use the list filters and pagination controls to find the products you need.
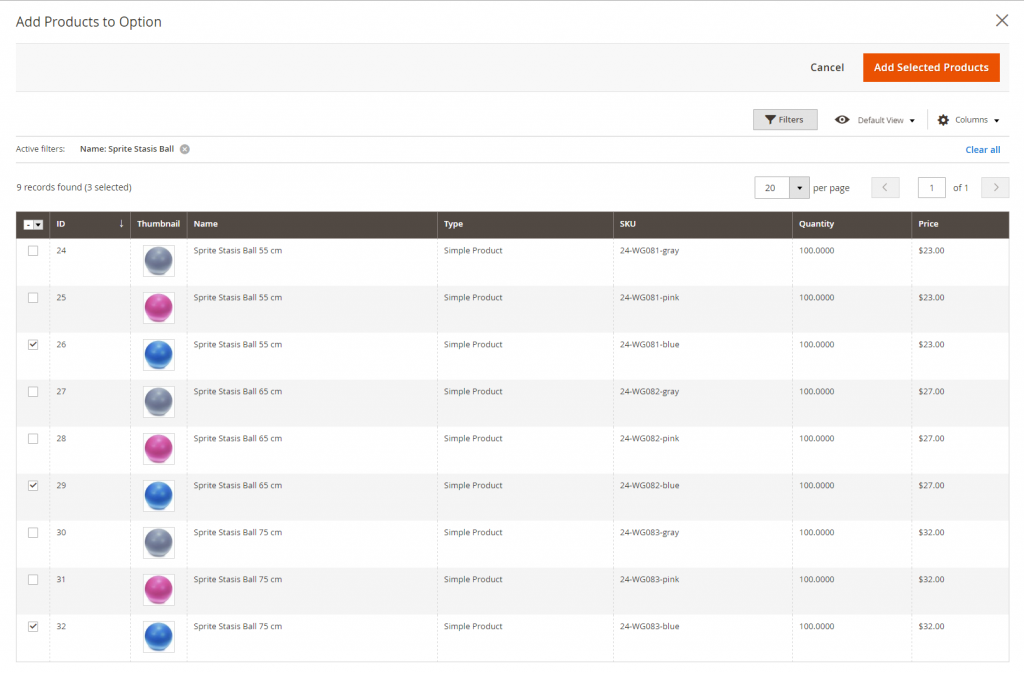
- Click Add Selected Products.
- Choose one to be the Default selection after the items appear in the Options section.
- Enter the quantity of each item added to the bundle when a customer chooses the item in the Default Quantity column.
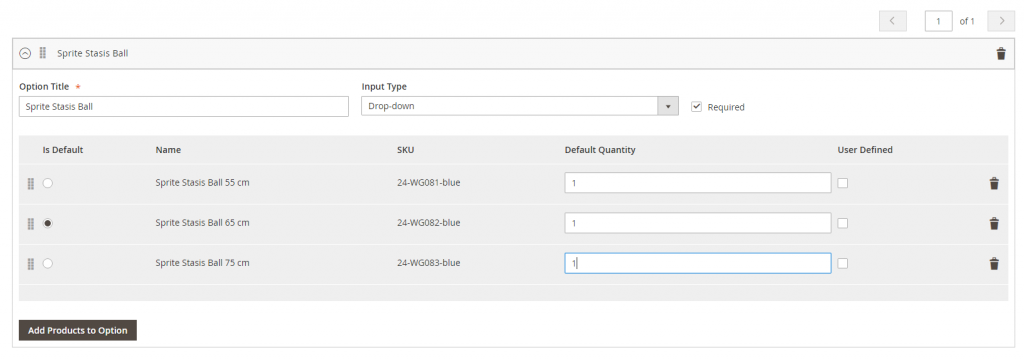
- Select the User Defined option to allow customers to modify the quantity of a bundle item.
The Default Quantity included in a bundle item cannot be changed by the customer by default. But, the customer can type the quantity of the item to be included in the bundle.
For example, if the Default Quantity of the Sprite Status Ball is 2, and the customer orders 4 of that option, the total number of purchased balls will be 8.
3/ Repeat these steps for each item you want to add to the bundle.
4/ Choose the Move icon at the beginning of the row and drag the item into position to change the order of the items.
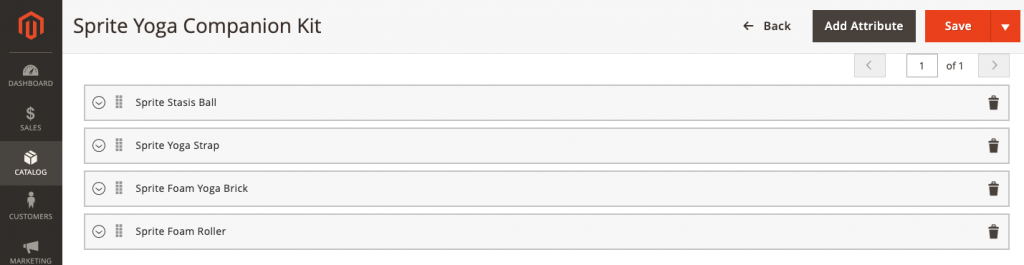
5/ To change the order of sections in a bundle product, in the header of the section, choose the Move icon and drag the section to the new position. Collapse each section first and then drag them into position to have a better view of the workspace.
6/ Delete to remove any item from the bundle.
7/ Save to finish.
Step 6: Complete the Product Information
Complete the information in the following sections if necessary:
- Content
- Related Products, Up-Sells, and Cross-Sells
- Search Engine Optimization
- Images and Videos
- Customizable Options
- Gift Options
- Design
- Products in Websites
Step 7: Publish the Product
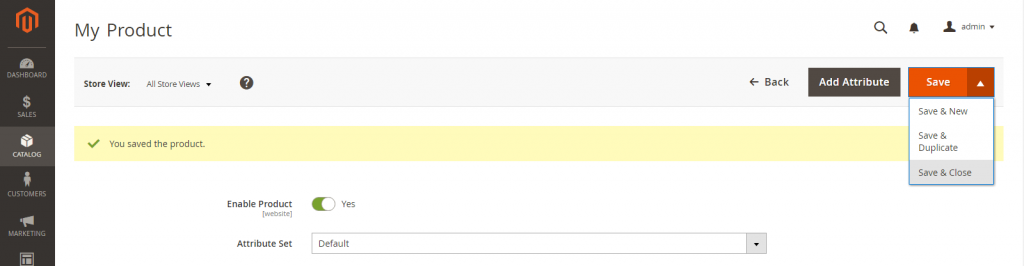
1/ Set Enable Product to Yes if you are ready to publish the product in the catalogue.
2/ Save and Close: Choose Save & Close on the Save menu.
Conclusion
As can be seen, the process involves a range of stages that are complicated. That’s why you have to read all of them as carefully as possible to create Magento bundle product successfully.
We hope that the Magento bundle product tutorial is informative and supportive enough for you. If you have any further questions or suggestions, let us know in the comment section below.