
Most commonly, novice developers use the WAMP server for learning as well as development. This post is a comprehensive instruction as to how to set up the server configurations and install Magento 2 on WAMP.
If you are interested in other Magento tutorials, click the link and discover more! Also, Information about Magento extensions and themes are always available in great quantities for your needs. Now, let’s move on to the part of the article.
What Is The Wamp Server?

WAMP is a software stack that means installing WAMP is to install Apache, MySQL, and PHP on your operating system. Let’s quickly check what each letter represents:
- W stands for Windows. There is also LAMP for Linux and MAMP for Mac.
- A stands for Apache, which is the server software that is accountable for serving web pages. When a page is requested to be seen by users, Apache grants your request over HTTP and shows you the site.
- M stands for MySQL, whose function is to be the database management system for your server. MySQL stores all of the related information like your site’s content, user profiles, and so on.
- P stands for PHP, which is a programming language used to write Magento. It acts like a glue for this whole software stack. PHP is functioning in conjunction with Apache and MySQL.
Why Should We Install Magento 2 On Wamp Server?

Instead of installing and testing Magento 2 on your hosting account, you can do it on your personal computer (localhost). As a virtual server on your computer, Wamp allows you to test all Magento 2 features without any negative consequences.
This means that you don’t have to wait until files get uploaded to your site, and this makes creating backups much easier.
WAMP is a safe space to work on your website without the need to host it online. It also has a control panel, so once you install the software package, all of the services will be installed on your local machine.
Whether you use WAMP for other operating systems or not, it’s an excellent way to save time. You don’t need to upload files to a site and can learn how to develop in a safe and care-free environment.
Straightforward Steps to Install Magento 2 On Wamp

1. Installing Wamp server
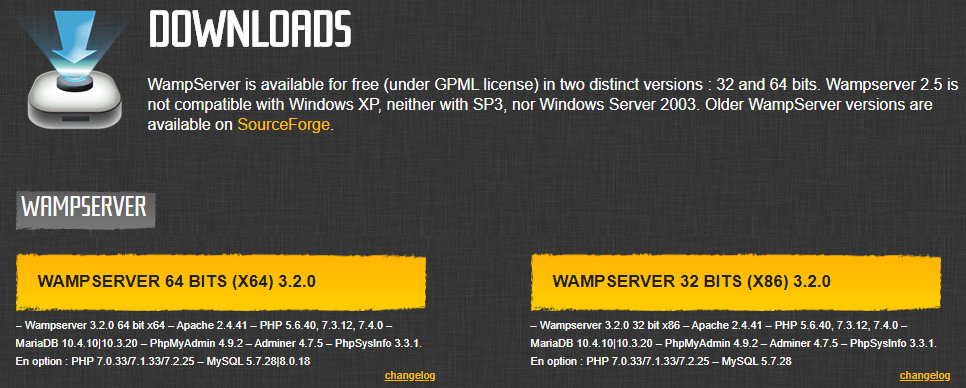
- Download your preferred edition of WAMP Server here
- Install WAMP (usually in C:\)
2. Getting Magento from Magento website
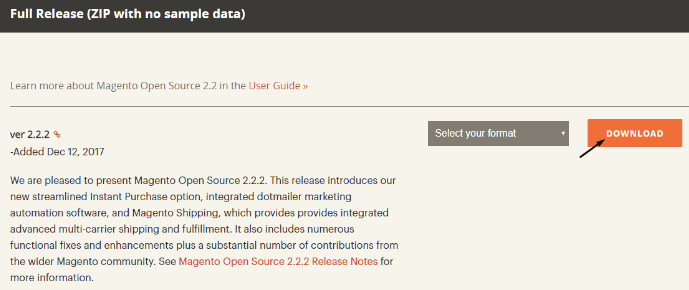
- Go to the Magento download page here
- Choose your favourite Magento edition and click on Download.
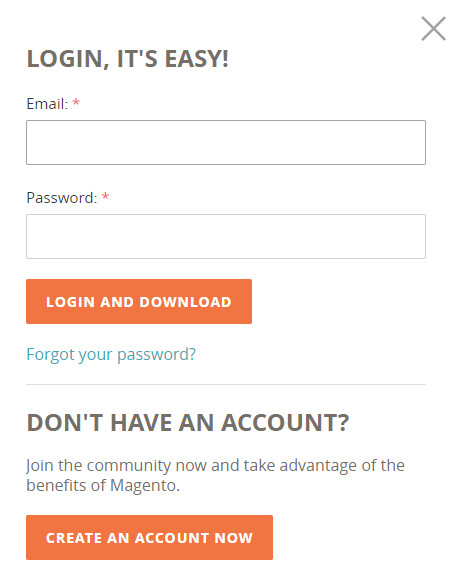
- Login will be needed so as to get the step proceeded.
3. Extract Magento file to WAMP
- Move your downloaded Magento File and extract it to a new folder (let say folder Magento) in WAMP/www.
- In your browser, navigate to localhost/Magento.
4. Magento installation
– Step 1: In the first pop-up, select Agree and Setup Magento, and then click Start Readiness Check to get your WAMP environment checked. If the checking process goes well as expected, click on the Next button to move on.
– Step 2: To establish your database:
- Open a new tab and go to http://localhost/phpmyadmin/, and then click New.
- Name the database Magento and select Create.
- Get back to the other tab when getting the below message and click Next.

– Step 3: In Web Configuration, make changes as you wish and click Next (In the Magento Admin Address box, you can enter just Admin to have better security and easily remember it).
– Step 4: In Customize Your Store, you can make changes as you wish, such as Time Zone, Currency, Language, and other Advanced Configurations. Click Next when finishing all the changes.
– Step 5: In Create Admin Account, enter your Username, Email, and set your Password. We highly recommend you should choose a strong password (including Numbers, Symbols, Capital Letters, and Lower-Case Letters). When finishing all, click Next to move on to the next step.
– Step 6: Click on the Install Now button to install Magento when you feel all of your configurations are ready. A message with your basic information will appear after the successful installation.
– Step 7: To access your Admin Panel, click Launch Magento Admin.
Frequently Asked Questions

1. Why is the installation of Magento stuck on “Customize your store”? How can we do to address it?
– Detail: During the process of installing a local instance of Magento on a Virtual Host using WAMP, I am stuck at the Customize Your Store screen. Clicking the Next button does nothing. It seems that there is an error in the javascript console:
angular.js:9928 TypeError: Cannot read property 'modules' of undefined at Object.$state.loadModules (customize-your-store.js:76) at h.$scope.checkModuleConstraints (customize-your-store.js:47) at angular.js:16888 at angular.js:18711 at h.$eval (angular.js:12703) at h.$apply (angular.js:12725) at HTMLButtonElement.<anonymous> (angular.js:18711) at angular.js:3396 at q (angular.js:228) at HTMLButtonElement.c (angular.js:3391)
– Solution:
+ Delete your current Magento 2 folder, copy the contents over again and the entire folder and contents to be Read/Write.
+ Uninstall your unused Firefox, delete its folder from your Program Files folder.
+ Download and install an older version, do the install from there, and let it sit on the Installing page for a long time with no visual representation of its progress.
+ Now, you see it works.
2. What can we do in case of errors in the Admin login page after installing Magento 2?
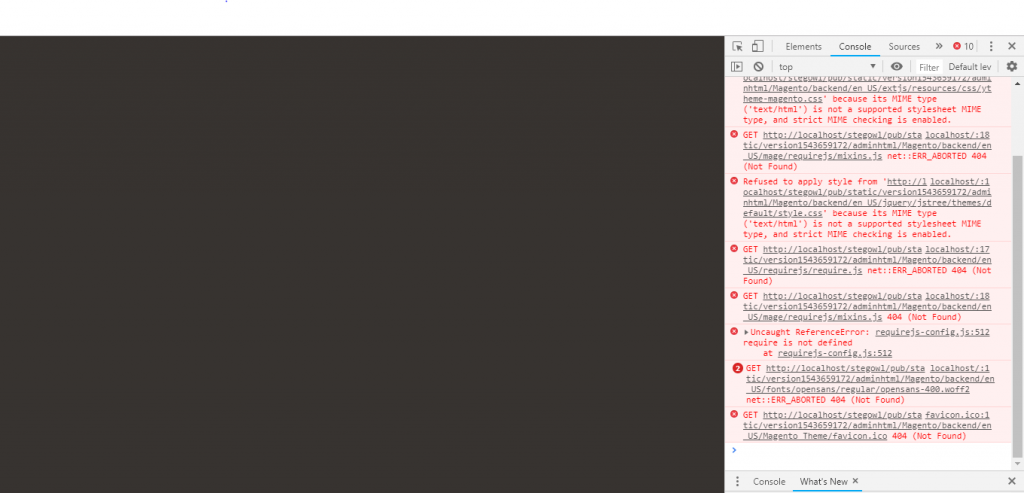
– Detail: I tried to install Magento 2 on Wamp. Then, when I opened the admin panel login, the screen was blank and my console contained an error as shown in the image.
– Solution:
+ Find:
foreach ($directories as $directory) { if (0 === strpos($realPath, $directory)) { return true; } }
+ Replace it with:
foreach ($directories as $directory) { $realDirectory = $this->fileDriver->getRealPath($directory); // and replace `$directory` with `$realDirectory` if (0 === strpos($realPath, $realDirectory)) { return true; } }
+ Now your problem is properly tackled.
3. How can we do to make Magento 2 perform faster after successfully installing it on Wamp?
– Detail: I was able to install Magento 2 on Wamp, but now it is very slow. It takes me 20 to 40 seconds to load a page (both in the Frontend and Backend).
– Solution: Download Xampp here and it may help get your problem solved.
Conclusion
It’s such a long tutorial in which we have gone through many aspects of the Wamp server and how to install Magento on Wamp.
We are so pleased to help you overcome all the problems in the process of using Magento 2. If you have any requests, questions, or suggestions, let us know in the comment section below. Many thanks for reading!
Read more: