In previous articles, we provided some important information about Using Themes in Magento 2 such as Using the Default Theme, Installing a New theme and Set up Theme Assets, Merging CSS and Javascript Files. This article is the final part of Using Themes in Magento 2. In this article, we will describe a tutorial on how to schedule design changes in Magento 2.
Store Design is one of the most important parts of the content design in Magento 2. In Advance, design changes can be scheduled so they go into effect on time. Store administrators can use scheduled design changes for seasonal changes, promotions, or just to add variation. For example, a design template for Valentine’s day can be scheduled to displayed from 13/2 to 14/2 then back to the standard template.

To schedule design changes in Magento 2, you can follow these steps:
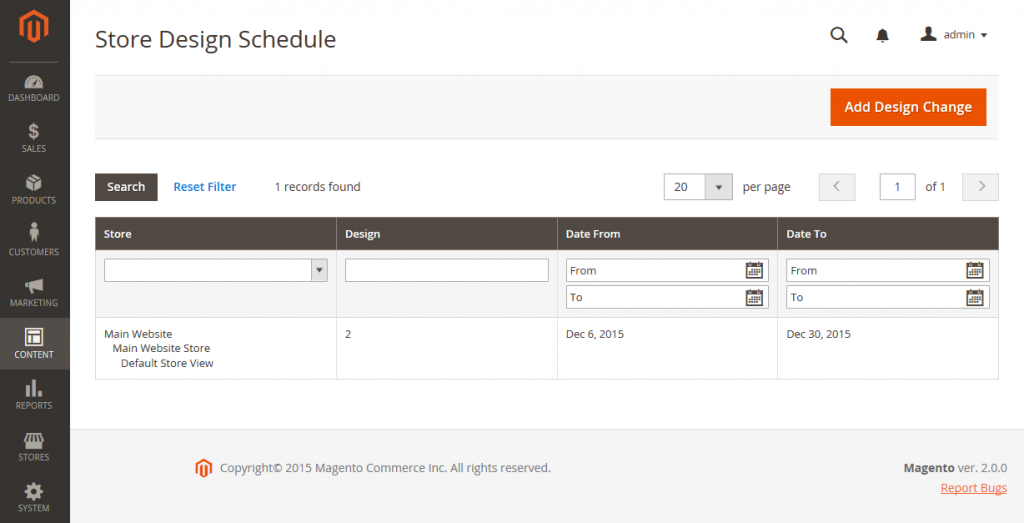
- On the admin sidebar click Content. Then under Design, click Schedule. Click Add Design Change button.
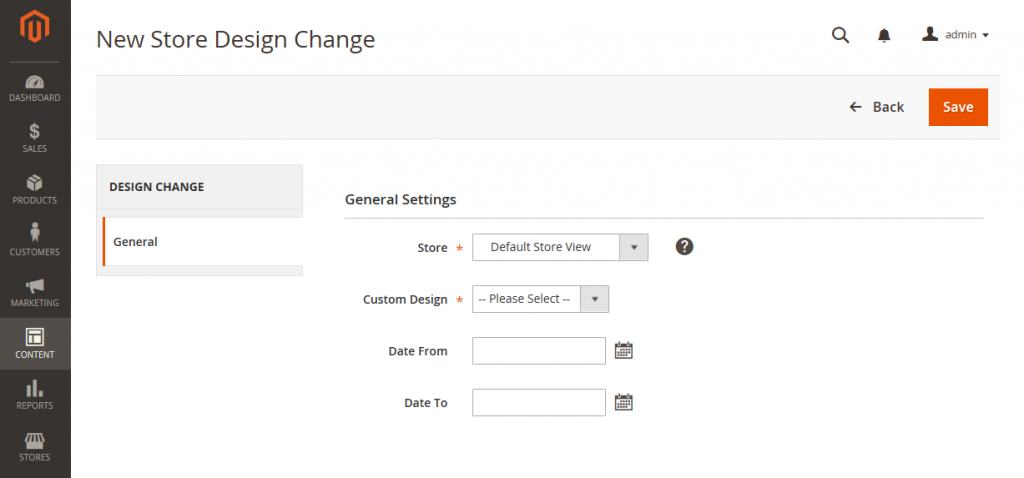
- In General Settings, set Store to the view that you want to apply the change.

- Set Custom Design to the theme, or variation of a theme, that is to be used.
- Use Calendar to choose the values for the Date From and Date To fields, so you can define the period when the change is in effect.
- Click Save after completed.
Above is a tutorial on how to schedule design changes in Magento 2. We hope that after reading this article, you can manage the Store Design Schedule in admin control panel. If you have other ways to schedule design changes in Magento 2, edit this tutorial, or request other tutorial articles, feel free to leave a comment below or contact us directly. See you in the next Mageguides article.

