
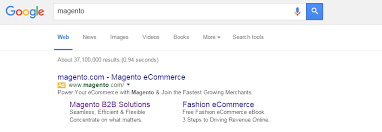
Google Adwords is an advertising service which is used to place ads on the top place of Google search results and on the webpages of companies in the Google Display Network. The Adwords control panel contains applications to manage your campaigns, track response, and measure results.
The number of ad clicks leads to a sale or other valuable action is displayed through the conversion tracking. So this is the reason why the “Success” page that appears to your customer after an order has been submitted is used to track conversions. There is no need to copy the conversion tracking script to the “Success” page after completing the Google Adwords configuration for your store, because Magento already has the necessary information.
Step 1: Create a Google AdWords Campaign
- Sign up for an account in Google Adwords site
- Follow the instructions to create a campaign
- To set up conversion tracking for your campaign, follow these tips
- On a Tools tab of your Adwords dashboard, click Conversions, then click Conversion.
- When prompted for the conversion source, click Website.
- Input the name of the conversion action that you want to track, after that, click Done.
- Click Value. Then if possible, assign value to a conversation. In example,
Assign a value of 10$ and choose “Each time it happens”, if you make 10$ on every single sale
Leave the value blank, if the value of each sale varies.
Then click Done.
- Click Conversion windows, and complete the settings to define attribution model, the reporting category, and how long the conversions are to be tracked.
- After completed, click Save and Continue.
Step 2: Get Your Conversion Tag
- Under Install your tag, on Page load, choose to count conversions.
- You can add the Google Site Stats notification to the conversion page as an option. The notification displays in the lower corner with a link to cookie usage and Google’s security standards.
- To determine the way you want to manage your AdWords tag, follow one of these tips:
- Choose Save instructions and tag, if you manage to add the script to your store yourself.
- Choose Email instructions and tag, if you manage to let someone else add the script to your store.
- After completed, click Done.
Step 3: Configure Your Store
- On the Admin sidebar, click Stores. Under Settings tab, click Configuration.
- Follow these tips, if you want to configure Google Adwords for a specific store view:
In the upper-left corner, select the Store View which is to be configured.
When scope switching are prompted to confirm, click OK.
- On the left of the control panel, under Sales tab, click Google API. After that, open the Google Adwords section and follow these tips:
Clear the Use Website checkbox for every single change in setting, if necessery.
Change Enable to “Yes”.
Input the Conversion ID from your Google Adwords script.
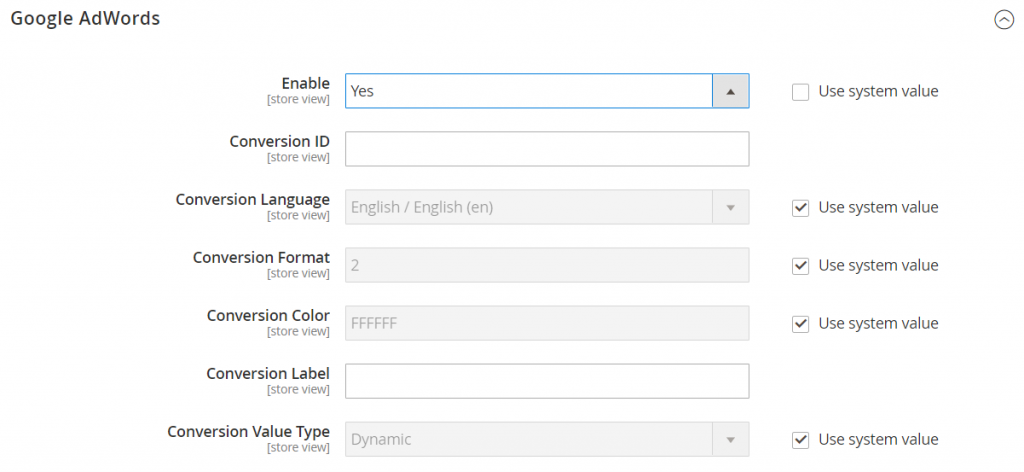
- Follow these tips to format the Google Site Stat notification:
Select the language for Conversion Language which is identified in your Google Adwords script.
Select the Conversion Format which is specific for the Google Sites Stat notification on the conversion page.
- Shows a one-line notification with a link to more information about Google tracking.
- Shows a two-line notification with a link to more information about Google tracking.
- Shows no customer notification.
Input the hexadecimal code for the Conversion Color that you want to use for the Google Site Stats notification label.
Input the encrypted text for the Conversion Label which is appears on the Google Sites Stat notification. In example: MlEYCOKBnGoQz6CZoAM.
Sample Google AdWords Tag Code:
<!– Google Code for Back to School Sale Conversion Page –>
<script type=”text/javascript”>
/* <![CDATA[ */
var google_conversion_id = 999999999;
var google_conversion_language = “en”;
var google_conversion_format = “3”;
var google_conversion_color = “ffffff”;
var google_conversion_label = “MlEYCOKBnGoQz6CZoAM”;
var google_remarketing_only = false;
/* ]]> */
</script>
<script type=”text/javascript” src=”//www.googleadservices.com/pagead/conversion.js”>
</script>
<noscript>
<div style=”display:inline;”>
<img height=”1″ width=”1″ style=”border-style:none;” alt=”” src=”//www.googleadservices.com/pagead/conversion/872829007/?label=MlEYCOKBnGoQz6CZoAM&guid=ON&script=0″/>
</div>
</noscript>
- Configure Conversion Value Type to one of the following:
| Dynamic | Specify that a conversion has occurred based on the dynamic Order Amount value. |
| Constant | Specify that a conversion has occurred based on a specific value entered. |
For a Constant conversion value type, input a specific Value for the Order Amount to qualify as a conversion.
- After completed, click Save Config
Step 4: Verify the Configuration
For several hours, the tracking status in your Google AdWords dashboard changes from “Unverified” to “Recording conversions” or “No recent conversions”. The conversion appears on the Conversion Actions page of your dashboard and campaign report when someone clicks your ad and makes a purchase.