Magento 2 comes with a lot of functionalities. Among the best features, I’m going to present Magento 2 Email Templates for merchants, which can send an email such as new orders, customers’ information, newsletters, and more.
Merchants can start their Magento store and receive various orders from customers; however, after launching the store for a while, store owners also want to communicate with their customers to retain them back to the store.
Therefore, Magento 2 Transactional Email can help you to interact with shoppers and to increase customer retention through the default Magento Email Template.
However, the default one maybe not fulfill some requirements. It is a reason why I’ll introduce how to customize Magento transactional email templates to meet all your demands.
Let’s go!
Customize Magento 2 Email Templates By Admin Panel
- First, clicking MARKETING > Communications > Email Templates in Magento Admin.
- Then, clicking Add New Template.
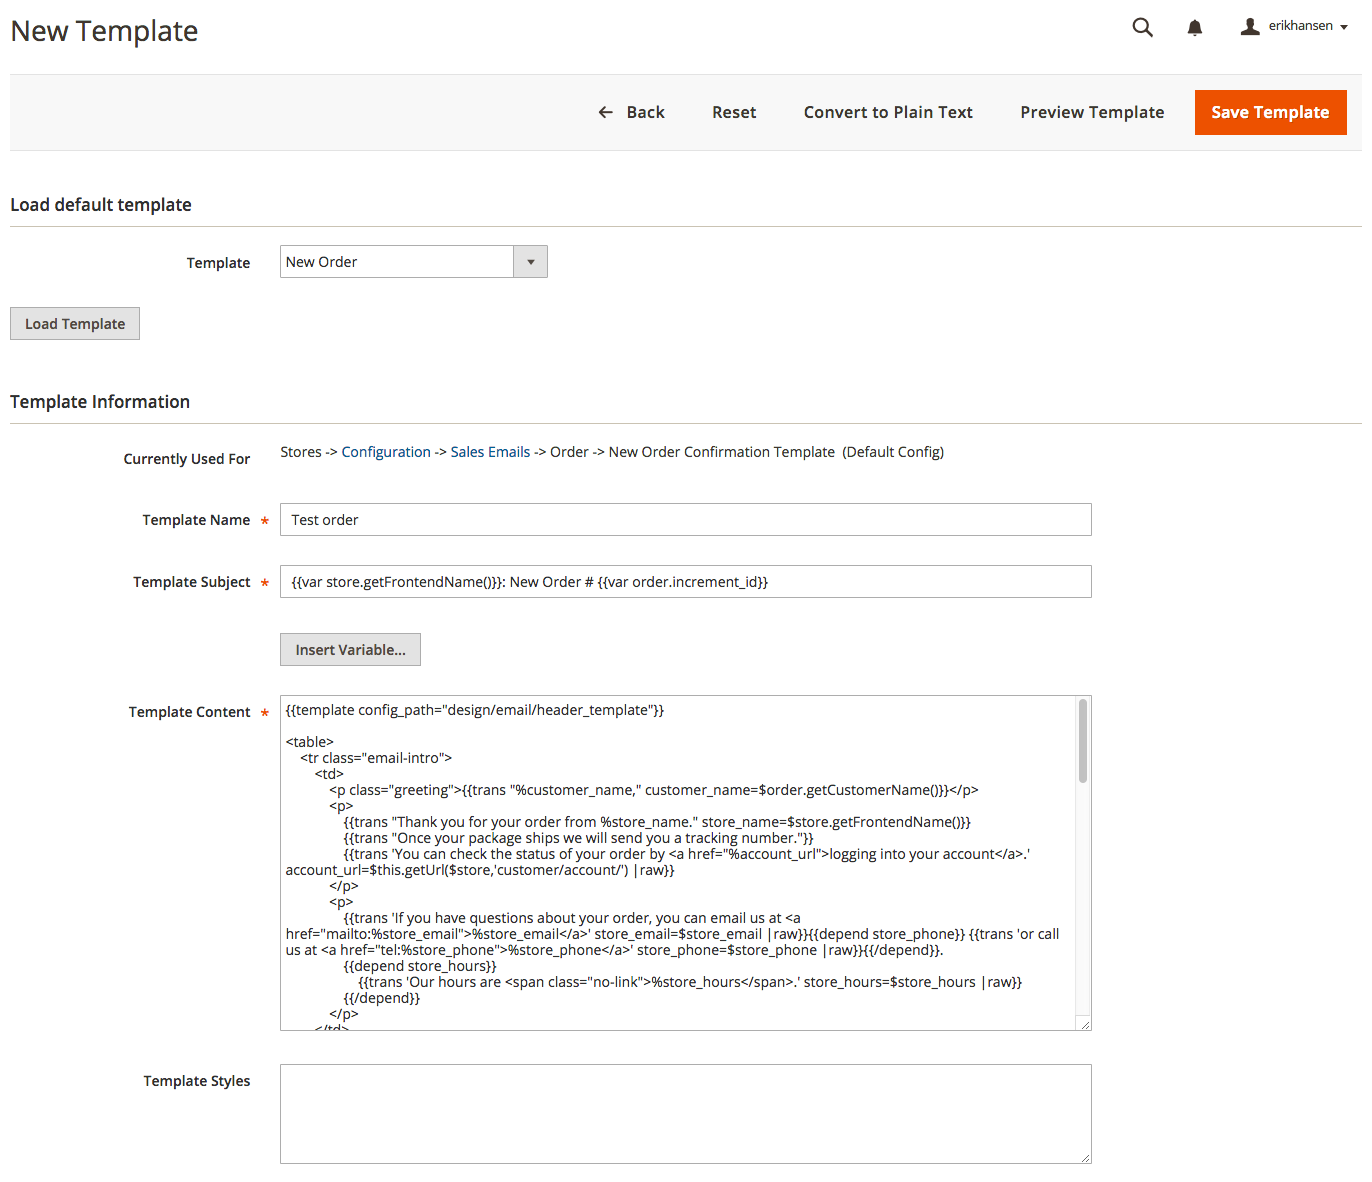
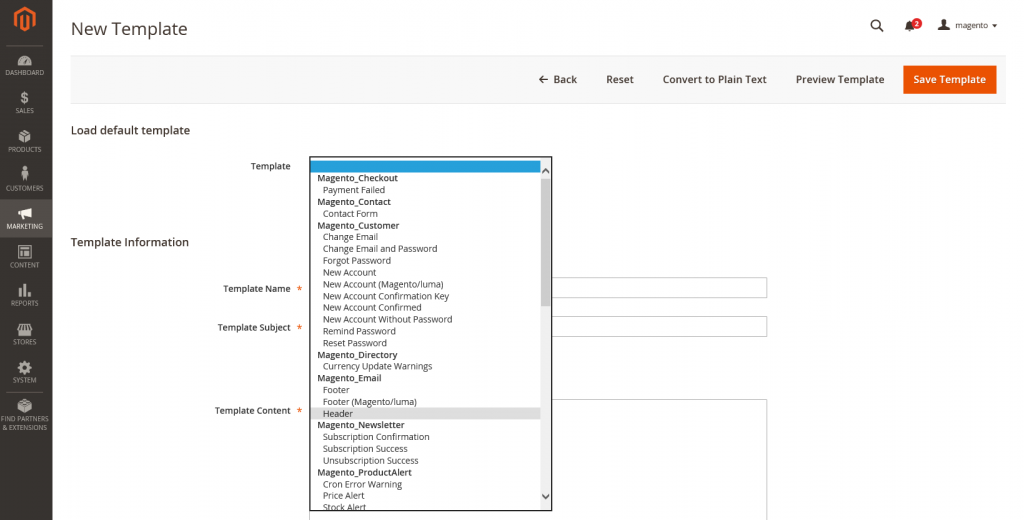
- You will see Load default template section > Load Template > Currently Used For.
 >>> Don’t miss this: Magento Tutorials for your store in 2020!
 - You enter a clear name in Template Name.
- Plain text to use as the Subject of the emails sent using the template you create in Template Subject. It is the Magento email templates variables.
- Customize the content.
- In Template Styles, optionally add CSS styles for the template. These styles are added inside of a <style> tag in the <head> of the email.
- Click Save Template.
- Now that you have created a template, you must configure that template to be used:
- If you haven’t done so already, log in to the Magento Admin as an administrator.
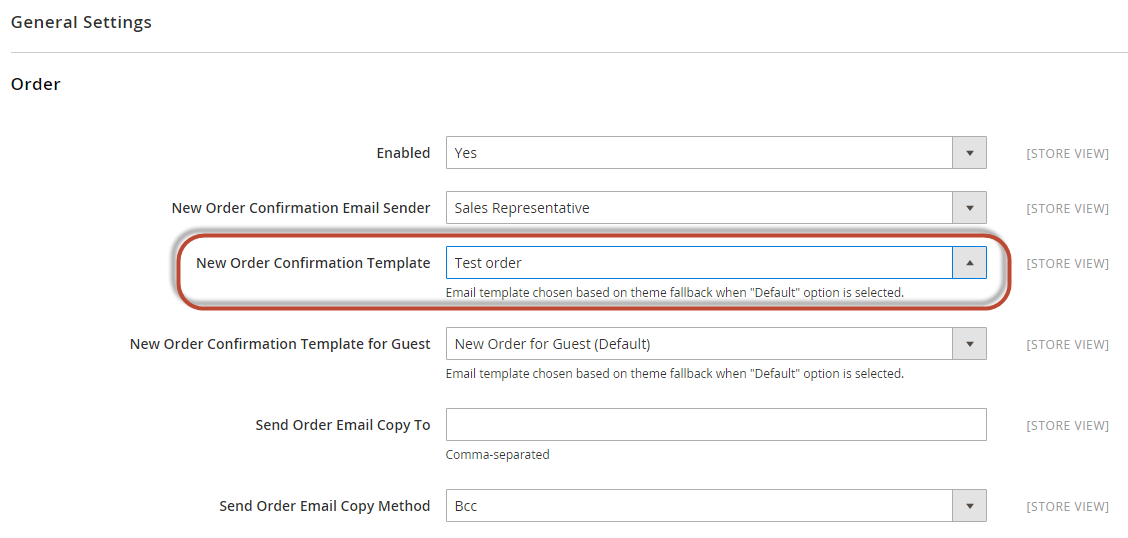
- Click STORES > Settings > Configuration > SALES > Sales Emails.
- Locate the section that contains the template you want to override.
What is the Magento 2 Footer Email Template?
The Footer Email Template is the ending part of the Email Template in Magento 2, the closing and signature line of the email message are included in this template.
Furthermore, the closing can be changed to fit your style, and the admin can add additional information such as the store name and address below the store name.

Configure the Magento 2 Footer Email Template
Step 1: Load the Default Template
- On the Admin Sidebar, click Marketing. In the Communications section, click Email Templates.
- Click Add New Templates. Follow these steps:
- In the Load default template, open the Template list under Magento_Email, select “Footer.”
- Click the Load Template.

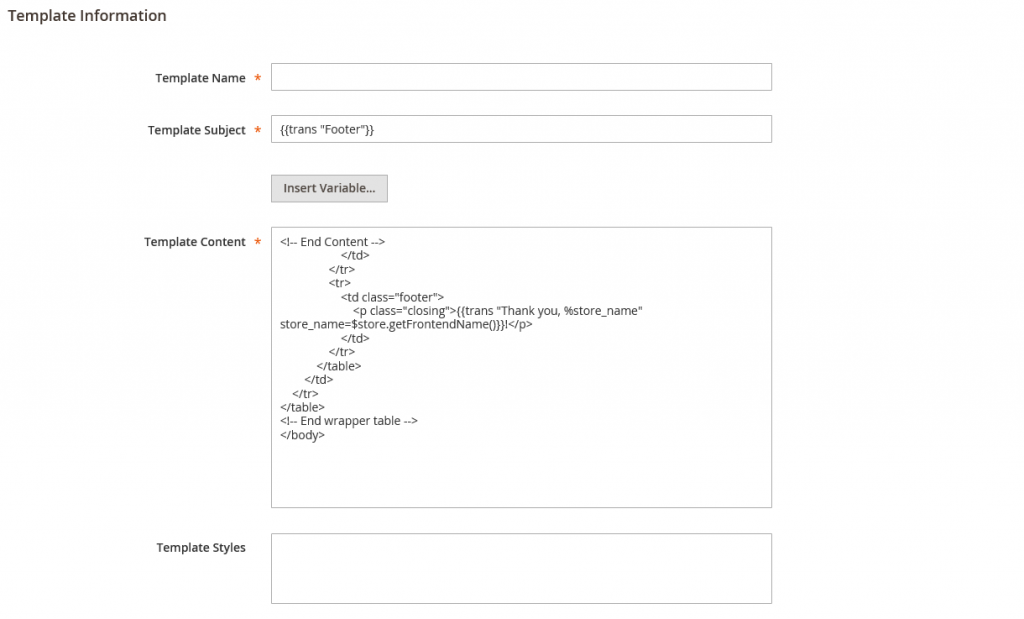
Step 2: Customize and Preview the Template
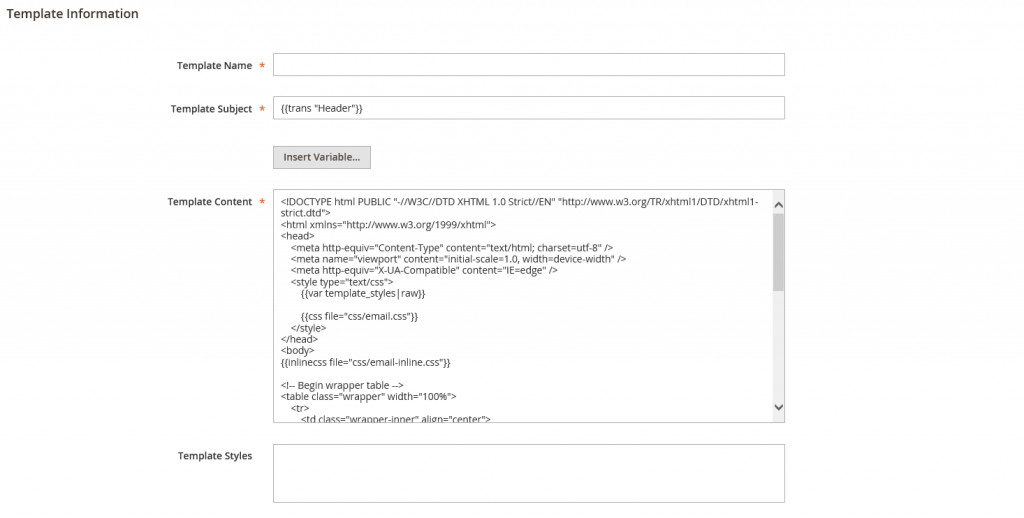
- Input the Template Name.
- Input a Template Subject so you can arrange the template later. In the grid, you can sort and filter the templates by using the Subject column.
 >>> Dont’ forget: Magento 2 Template Hints to identify your store structure!
 - You can edit the HTML code in the Template Content box, remember not to overwrite anything that is enclosed in double braces.
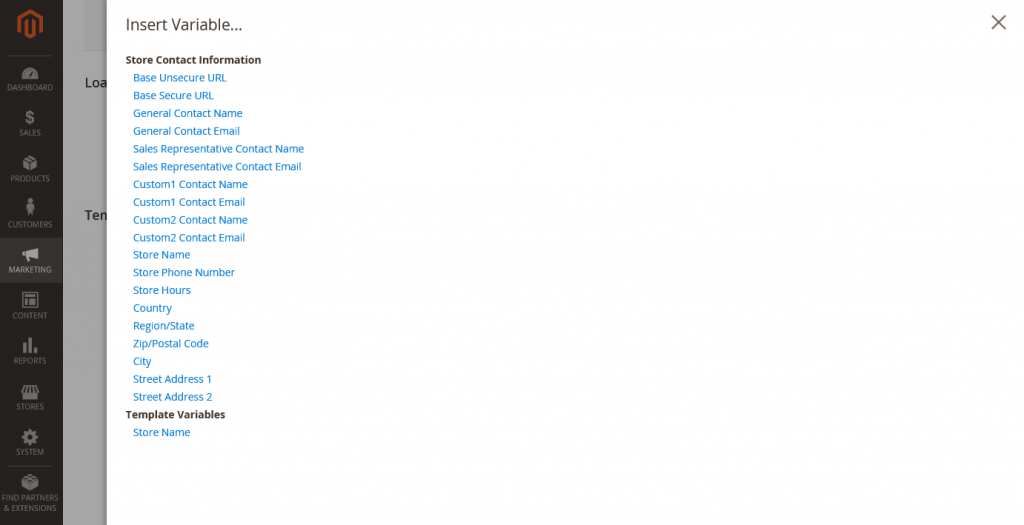
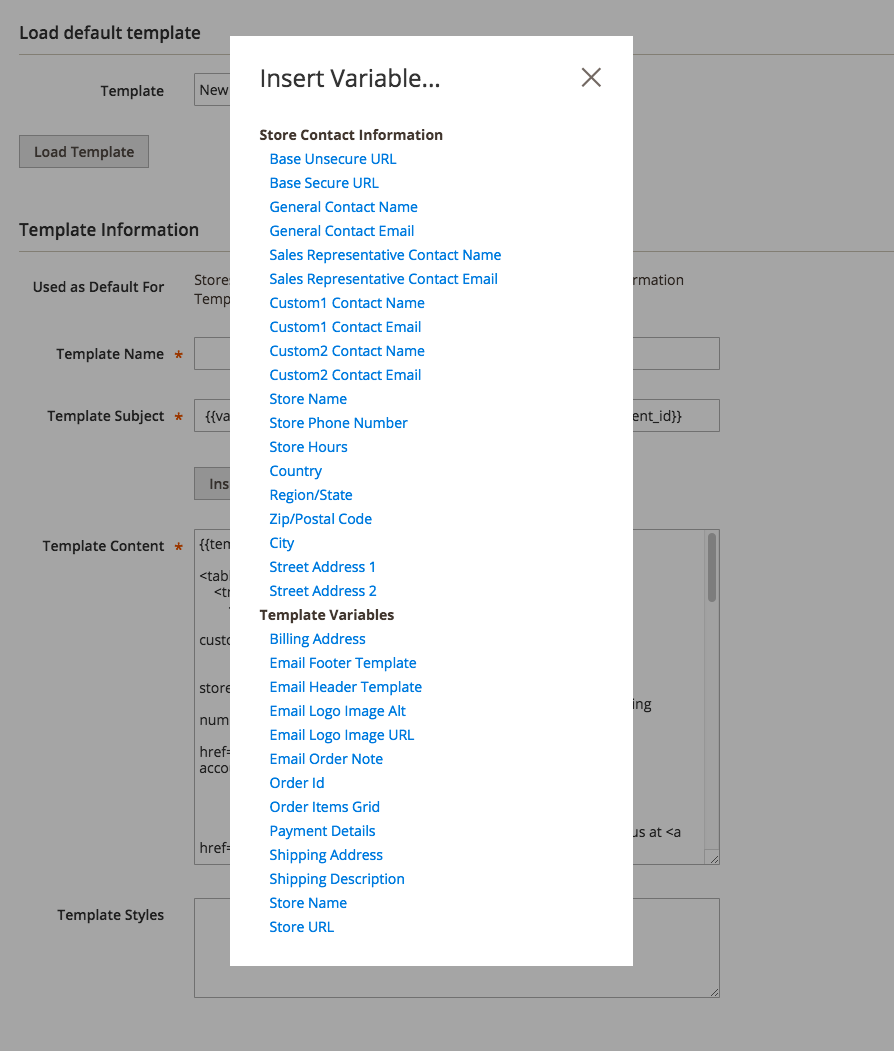
- If you want to insert a variable, place the cursor in the code where the variable will be displayed, click Insert Variable. After that, select the variable you want to insert. When you selected a variable, a markup tag for the variable is inserted in the code.

- Input the CSS code in the Template Style box to change CSS declarations.
Step 3: Update the configuration
- On the Admin sidebar, click the content. After that, in the Design section, click Configuration.
- In the grid, choose the store view that you want to edit. Click Edit.
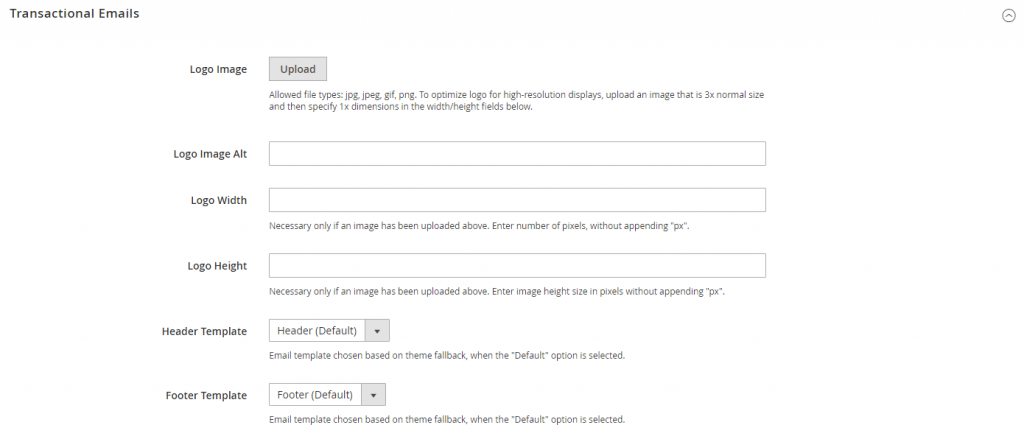
- Scroll down and open the Transactions Email.
- Select the default Header Template for email notifications.
- Click Save Config after completed.

Field Descriptions
| FIELD | DESCRIPTION |
| LOAD DEFAULT TEMPLATE | |
| Template | The choice of available templates will be listed and recognizes the template to be customized |
| TEMPLATE INFORMATION | |
| Template Name | The name of your custom template. |
| Insert Variable | a Store Contact Information variable can be inserted into the template at the cursor location. |
| Template Subject | In the Subject column, the Template Subject displayed to sort and filter the templates in the list. |
| Template Content | The HTML content of the template. |
| Template Styles | In the Template Styles box, you can enter any CSS style declarations to format the template header. |
What is Magento Header Template?
Magento header is the content on the top of the email template, which is sent automatically as a message from your Magento 2 web store.
Moreover, Magento Email Logo and store contact are usually included in the email header template, and of course, you can add Magento email templates variables to the Header to add store contact information.
Configure Magento Header Template
Step 1: Load the default template
- On the Admin sidebar, click Marketing. In the Communications section, select Email Templates.
- Click Add New Template, follow these steps:
- In Load Default Template, open the Template list under Magento_Email, click Header.
 >>> Interested? Check out Magento 2 Shopping Cart to get your customers better!
Then, click Load Template to display the template HTML code and variables in the form.
Step 2: Customize the Template
- In the Template Information section, follow these steps.
- Input the Template Name for your email header template
- Input the Template Subject so you can arrange the templates later. The subject column can filter and sort the list of templates in the grid.
- Edit the HTML code as needed in the Template Content box, remember not to overwrite anything that is enclosed in double braces.
- If you want to insert a variable, place the cursor in the code in the same place that the variable will display, click Insert Variable. Then select the variable you want to insert. After that, the markup tag for the variable is inserted in the code.
- Click Preview Template to review your header template. If you need any adjustments, just edit the template as needed.
- Click Save Template when you’re done. Now you can see the custom header displays in the list of available Email templates.
Step 3: Update the configuration.
- Admin Sidebar > Content. In the grid, choose the store view that you want to edit. Click Edit
- Scroll down and open the Transactions Email.
- Select the default Header Template for email notifications.
- Click Save Config after completed.
 >>> Check it out: Secure your eCommerce store with Magento 2 SSH Key!
Field Descriptions
| FIELD | DESCRIPTION |
| LOAD DEFAULT TEMPLATE | |
| Template | The choice of available templates will be listed and recognizes the template to be customized |
| TEMPLATE INFORMATION | |
| Template Name | The name of your custom template. |
| Insert Variable | a Store Contact Information variable can be inserted into the template at the cursor location. |
| Template Subject | In the Subject column, the Template Subject displayed to sort and filter the templates in the list. |
| Template Content | The HTML content of the template. |
| Template Styles | In the Template Styles box, you can enter any CSS style declarations to format the template header. |
How To Customise Magento Email Content?
To add Magento 2 transactional email template content, you should follow some steps below.
- Clicking MARKETING > Communications > Email Templates in Magento Admin.
- Create a new template or edit an existing template.
- Click to place the cursor in the text in which to insert the variable.
- Click Insert Variable. Choosing a variable that is suitable for your requirements in the pop-up.
Customize Styles for Magento 2 Email Templates
#1. Magento 2 email templates Inline styles
Some emails are supported by CSS style, which has been applied as “inline” styles on the style attribute of HTML tags.
Therefore, to create and customize Inline styles, you can follow the code:
<Magento_Email_module_dir>/view/frontend/email/header.html it is the location of the Inline Styles.
<?{{inlinecss file="css/email-inline.css"}}
So, the Inline CSS directive will tell Magento which files to apply as inline styles on the email template.
#2. Magento 2 Transactional Emails Non-inline styles
- Global non-inline styles
Although the majority of Inline Styles are applied, many CSS styles cannot be applied by Inline Styles, for example, media queries.
The styles of this Magento transactional email template can be in a <style type=”text/css”></style>
The <Magento_Email_module_dir>/view/frontend/email/header.html file contains a css directive inside of a <style> tag:
<style type="text/css">
{{var template_styles|raw}}

{{css file="css/email.css"}}
</style>
- Magento transactional email template-specific non-inline styles
The header .html file outputs the {{var template_styles|raw}} variable. So, the value can come from any of the following:
<!--@styles
 .example-style { color: green; }
@-->
It will help you customize Magento transactional email templates and add CSS style.
How to Customize Magento Email Logo?
#1. Using a theme
The email logo image format is JPG, GIF, or PNG, and the image should be 3x the size that you want it to display.
For example, your email has a 500px × 200px area for the logo. The logo image should be 1000px × 600px.
Therefore, to customize your logo, you need to add file logo_email.png to a Magento_Email/web.
Then, copy the <Magento_Email_module_dir>/view/frontend/email/header.html file into a Magento_Email/email directory in your theme.
And, edit the width and the height of the <img>
<?{{if logo_width}}

    width="{{var logo_width}}"

{{else}}

    width="200"

{{/if}}

{{if logo_height}}

    height="{{var logo_height}}"

{{else}}

    height="100"

{{/if}}
#2. Using the Admin Panel
- Clicking to CONTENT > Design > Configuration > Edit.
- Under Transactional Emails in the Logo, the Image field uploads your logo and specifies the alternative text for it.

- Enter values for Logo Width and Logo Height. Based on the preceding example, you would enter 1000 and 600, respectively.
- Click the Save Configuration button.
Wrapping Up
These are all about the customization of Magento 2 Email Templates for your store from A-Z. If you have any questions, don’t hesitate to contact or write a comment.
We’re 24/7 support you.
Thank you for reading!